TL;DR
If you’re buying specifically to reduce eye strain caused by glare and harsh screen-to-room contrast, BenQ’s ScreenBar-style approach (strong asymmetrical “screen cutoff” optics + wide dimming/CCT control) is usually the safer bet. Yeelight can still be a good value for basic desk illumination, but model-to-model optics and fit vary a lot — so you’ll want to verify it truly keeps light off the display and works with your monitor shape before you buy.
Top Recommended Lighting & Environment
| Product | Best For | Price | Pros/Cons | Visit |
|---|---|---|---|---|
| BenQ ScreenBar Pro LED Monitor Light Bar | Lowest glare and strongest desk-focused light | $125 – $150 | Excellent cutoff-style desk lighting; costs more than most light bars | Visit Amazon |
| Yeelight monitor light bar (model varies) | Budget-friendly desk illumination in moderately lit rooms | $35 – $90 | Often good value for general task lighting; verify real screen-cutoff optics and monitor fit first | Visit Amazon |
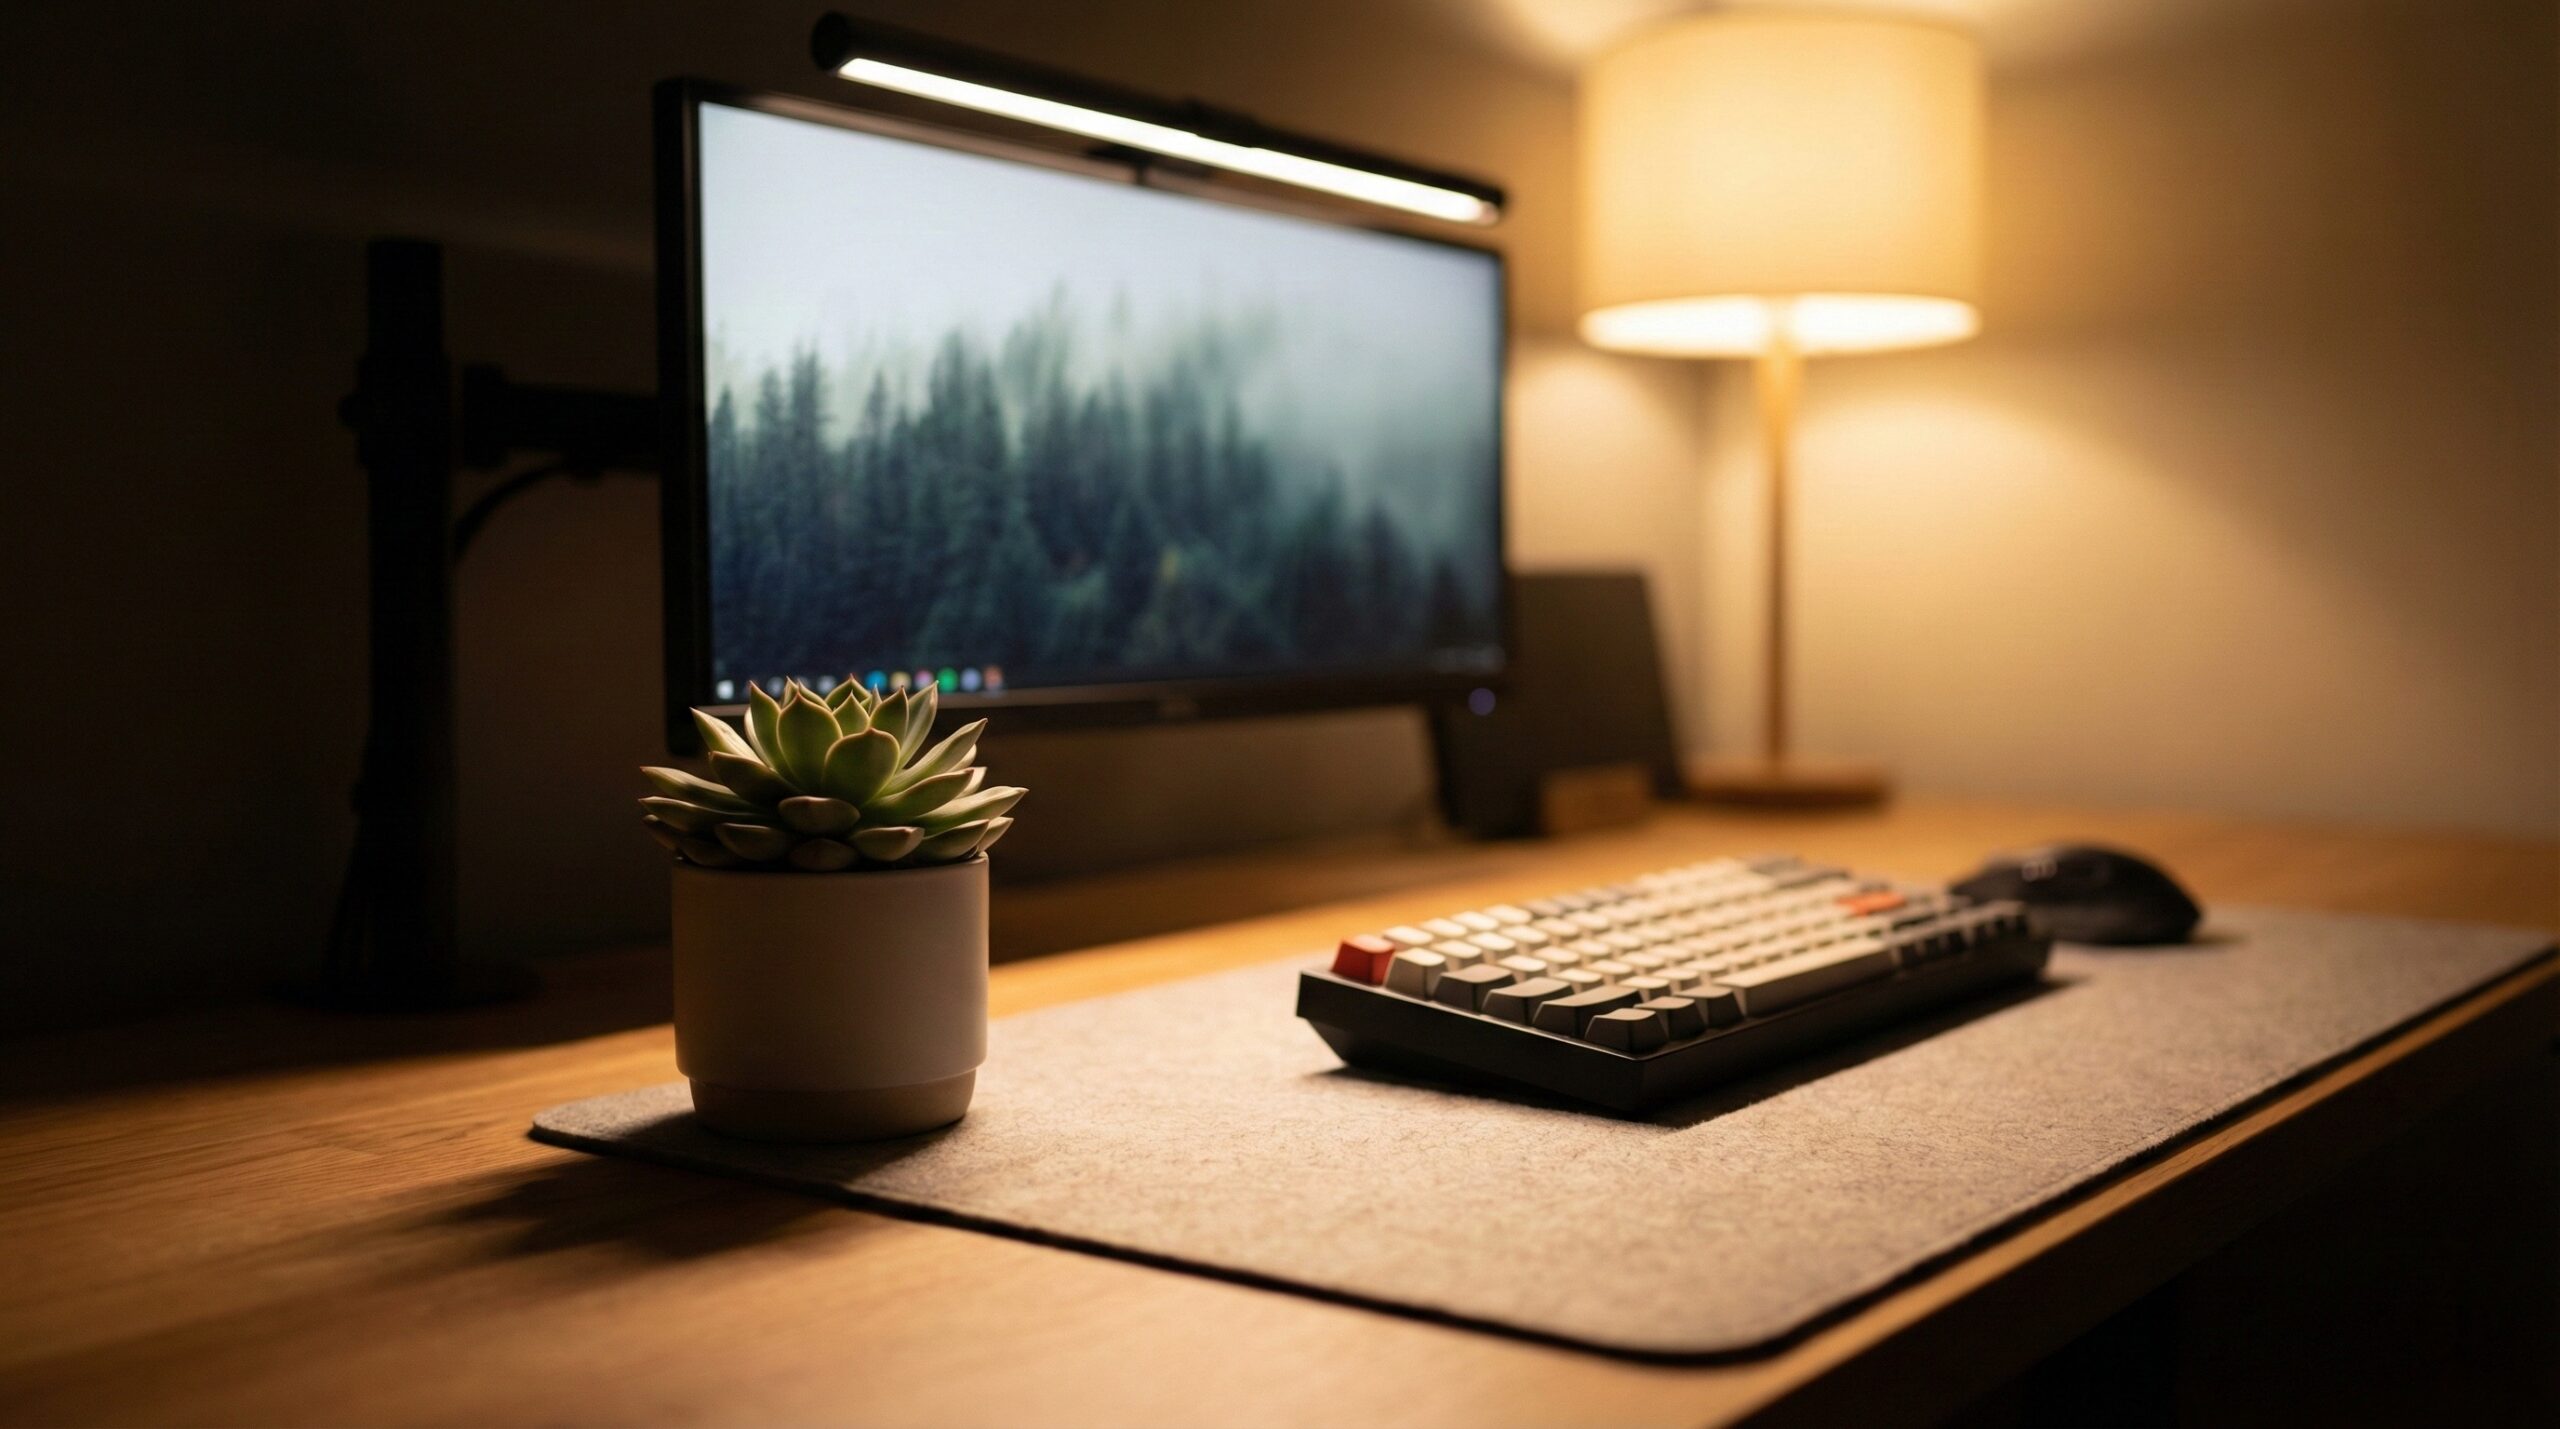
BenQ ScreenBar Pro LED Monitor Light Bar
Best for: People who want the most reliable glare control and “desk-only” lighting to reduce the bright-screen/dark-room effect.
The Good
- Asymmetrical optics with a sharp cutoff: The main reason ScreenBar-type lights tend to feel easier on the eyes is that they’re designed to illuminate the desk surface without shining onto the monitor (less reflection and less “veil” glare).
- Strong comfort tuning: A wide dimming range and adjustable color temperature makes it easier to match your environment — brighter/neutral for daytime tasks, warmer/dimmer for night work.
- Cleaner desk setup: It replaces (or reduces reliance on) a desk lamp that can cast shadows across your keyboard/notebook or reflect off glossy screens.
- Good track record in user feedback: With a large volume of reviews, it’s easier to spot consistent patterns around build quality and day-to-day use.
The Bad
- Price: You’re paying a premium for optics/control polish, which may be overkill in a room that’s already evenly lit.
- Fit can be picky: Thick monitor housings, aggressive curves, or rear “bumps” can force a suboptimal angle — exactly what you don’t want for glare control.
- Not a medical fix: If headaches/blur persist, lighting changes may not be the root cause.
4.8/5 across 1,174 Amazon reviews
“This light bar really exceeded my expectations. It fits seamlessly on my 34” curved Dell monitor, and the silver color blends in perfectly, sleek, clean, and not distracting at all. It’s also super lightweight, so it doesn’t feel bulky or awkward up top.What really impressed me is the mounting design. It uses these soft rubber “clamps” (for lack of a better…” — Verified Amazon buyer (5 stars)
“The BenQ Screen Bar was exactly what I didn’t know I needed. It lights up my keyboard and desk with a flexible lighting solution. All the features work well and make it a great product. The auto on/off works well to conserve energy. Being able to set the brightness and color temperature and then save it as a favorite is a real plus. Or I can use the option…” — Verified Amazon buyer (4 stars)
Typical price: $125 – $150
Our Take: If your goal is “less eye strain” (not just “more light”), this is the kind of monitor bar we’d start with because the optics strategy is the point: light the desk, keep the screen dark. That aligns with general workstation guidance that reducing glare and extreme contrast tends to be more helpful than simply making the area brighter (see the American Optometric Association guidance on Computer Vision Syndrome and NIOSH ergonomics resources). If you’re on a curved or unusually thick monitor, do the fit check first — because the best optics don’t help if you have to tilt the bar into your screen.
Yeelight monitor light bar (model varies)
Best for: Buyers who want a lower-cost monitor-mounted light mainly for general desk illumination — and who are willing to double-check the specific model’s optics and monitor compatibility.
The Good
- Value-oriented pricing: Yeelight options often cost much less than premium “cutoff optics” bars, which can make sense if you mainly want extra task lighting.
- Simple way to reduce desk shadows: Like any bar above the display, it can help light your keyboard/notebook without a lamp arm taking up desk space.
- Can be “good enough” in already-lit rooms: If your room lighting is decent and your main issue is a dim desk surface, a budget bar can still improve comfort.
The Bad
- Optics vary by model: The whole eye-comfort advantage depends on a real screen cutoff. If the bar throws light onto the display, you may get reflections and more discomfort.
- Fit/mount variability: Some clamps/weights are less forgiving on thick housings, curved monitors, or monitors with rear protrusions.
- Harder to “recommend one” without the exact SKU: Yeelight naming and availability can shift, so you need to confirm the exact model’s specs and return policy.
Our Take: Yeelight can make sense if your priority is budget-friendly desk lighting and your monitor is a straightforward flat panel. For eye strain specifically, we’d be cautious: the biggest deciding factor isn’t raw brightness — it’s whether the optic design keeps light off your screen surface to avoid reflections. If you’re trying to solve glare/contrast issues, treat Yeelight as “verify-first,” and do a quick reflection test as soon as it arrives (details below).
Feature deep-dive: what actually reduces eye strain with a monitor light bar
“Eye strain” is a bucket term. For home office setups, a lot of discomfort is driven by a few predictable contributors: glare on the display, very high contrast between a bright screen and a dark room, and long unbroken focus time (blink rate drops when we stare at screens). A monitor light bar can help, but only when it addresses those first two issues.
- Asymmetrical optics (screen cutoff) is the main feature that matters. A proper monitor light bar aims light forward and down, with a cutoff so the beam doesn’t wash onto the screen. That’s why ScreenBar-style products are often favored in head-to-head tests: they’re built around glare avoidance, not just “more lumens.”
- The real goal is contrast reduction. You’re trying to avoid the “flashlight effect” where your screen is the brightest thing in your field of view. Bringing the desk area up closer to the screen’s brightness can feel more comfortable for reading/coding sessions. This aligns with general ergonomics guidance around glare control and balanced lighting (see NIOSH workstation ergonomics).
- Color temperature is a comfort control, not a cure. Many people prefer warmer light at night because it feels less harsh, while neutral/cooler light can feel “cleaner” for daytime tasks. Choose what keeps you comfortable without making text look muddy or reducing task visibility.
- Dimming range matters as much as max brightness. The most common “miss” with cheaper bars is that the lowest setting is still too bright for evening use — so you end up turning it off, and you’re back to a bright screen in a dark room.
- If your room lighting is already good, a bar might not change much. In a well-lit office with even ambient light, you may get more improvement by lowering monitor brightness, reducing reflections (window positioning), or adding soft bias lighting behind the monitor.
If you want a practical baseline for digital eye strain habits beyond lighting (breaks, blinking, screen distance), the American Optometric Association’s Computer Vision Syndrome overview is a solid starting point.
BenQ vs Yeelight for eye strain: what to prioritize
When readers ask “BenQ vs Yeelight,” what they’re usually weighing is: premium optics/control vs value pricing. Here’s how we’d translate that into buying decisions.
1) Glare control (screen reflections) beats brightness
A bright bar that hits your screen can create reflections and a hazy “glare layer,” especially on glossy or semi-gloss displays. That discomfort can show up as squinting, headaches, or that feeling that text looks “washed.”
How it plays out: BenQ’s ScreenBar line is known for the cutoff concept. With Yeelight, you need to confirm the specific model is truly designed as an asymmetrical monitor bar — not just an LED strip perched on top.
If you want to see a consumer-style comparison that focuses on how different bars handle glare and cutoff, BTOD has a helpful overview here: BTOD monitor light bar comparison.
2) Low-end dimming is what makes a bar usable at night
In real life, many people buy a light bar because night work is uncomfortable: the room is dark, the screen is bright, and a desk lamp causes annoying reflections. For that scenario, the key is whether you can run the bar very dim while still keeping the desk visible.
Our guidance: Favor bars with stepless dimming or very fine steps, and test the lowest setting in the environment you actually work in. If the bar is too bright at minimum, it won’t solve the contrast problem — it just replaces one uncomfortable lighting situation with another.
3) Warm vs cool light: choose comfort, then verify visibility
Warmer settings can feel gentler during evening sessions, while cooler settings may feel better for alertness during the day. There isn’t one “correct” color temperature for everyone; what matters is that you can tune it quickly, and the light doesn’t distort your work.
If you do color-critical work: You may want to keep your light closer to neutral while editing, then switch warmer later for reading/email. If you’re unsure, a certified ergonomist or occupational therapist can help you set up lighting that supports both comfort and task demands.
4) Fit and aiming can make or break eye comfort
A monitor light bar is only “anti-glare” if it’s physically stable and aimed correctly. If the mount forces the bar to tilt down too steeply (or too shallow), the cutoff line can creep onto the screen — exactly what you’re trying to avoid.
In practice:
- Thick monitor housings can prevent the bar from sitting level.
- Curved monitors can create uneven lighting across the desk, and some mounts simply won’t sit securely.
- Rear bumps (cable bulges, RGB modules, or design protrusions) can keep the counterweight from resting properly.
Fit & setup checklist (avoid buying the wrong bar for your monitor)
Before you click “buy,” do a quick fit sanity check. This is where a lot of frustration comes from — especially if you’re on an ultrawide, a curved screen, or a gaming monitor with a chunky rear shell.
Step 1: Measure thickness and check the back shape
- Measure monitor thickness at the top edge where the bar will sit.
- Look for rear protrusions near the top center (ports, vents, design ridges) that might interfere with a counterweight mount.
- Plan for stability: if it wobbles, you’ll be tempted to tilt it — tilting is a common path to screen glare.
Step 2: If your monitor is curved, assume “maybe” until proven otherwise
- Confirm the mount explicitly supports curved screens (or includes an adapter).
- Expect that even if it “fits,” the light distribution can be less even across the desk compared to a flat monitor.
Step 3: Do the 30-second glare test after install
This is the simplest way to tell whether the bar is actually helping your eye strain goals.
- Turn the room lights low.
- Put a black image/fullscreen black window on the monitor.
- Turn on the light bar and look for reflections, streaks, or a bright band on the display.
If you see obvious reflections, try re-aiming the bar (angle/position). If you can’t eliminate glare without making the desk too dim, that’s usually an optics limitation — not a “settings” issue.
Step 4: Power and cable routing
- Use a properly rated USB power source and cable. Avoid damaged cables.
- Be cautious with monitor USB ports that sleep-cycle or provide limited power — flicker or dropouts are annoying and can be visually fatiguing.
- Route the cable so it doesn’t tug the bar off-angle over time.
How to tune your lighting for less eye strain (practical settings)
Think of a monitor light bar as part of a system: screen brightness, ambient room light, and task light should work together. If one is extreme (super bright screen in a dark room), your eyes do more work.
1) Match screen brightness to the room first
Start by reducing monitor brightness so white backgrounds aren’t blasting your eyes. Then bring desk lighting up until the area around the monitor doesn’t feel dramatically darker than the screen. This approach aligns with common digital eye strain recommendations (see the AOA Computer Vision Syndrome guidance).
2) Aim the bar so the desk is the brightest zone
You generally want the “hotspot” on your keyboard/mouse/notebook area — not on the monitor. If you can see the beam on the display when it’s showing black, the bar is either aimed wrong or the cutoff isn’t doing its job.
3) Evening preset: warm + low, but not cave-dark
- Set the light warmer if that feels more comfortable.
- Dim it down until it stops feeling like an overhead spotlight.
- Keep enough light to read paper notes without leaning forward or squinting.
4) Daytime preset: neutral + enough brightness for contrast balance
During the day, you may prefer a more neutral setting so text looks crisp and your workspace doesn’t feel “yellow.” If your room has daylight, you may not need the bar very bright — just enough to reduce desk shadows and keep the work surface from feeling dim.
5) If you feel no difference, don’t force it
Not everyone benefits. If your room is already evenly lit and you don’t have reflections on the screen, a light bar might not move the needle. In that case, you may get more comfort from:
- repositioning the monitor to reduce window reflections,
- adding soft ambient light in the room,
- or adding gentle bias lighting behind the monitor.
Other Notable Alternatives Worth Considering
We focused this comparison on a BenQ ScreenBar-style option versus Yeelight as a “value brand” approach. If you’re still shopping, there are other monitor light bars on the market with different mounts, controls, and cutoff performance — but we recommend treating any alternative the same way: prioritize true asymmetrical optics, verify dimming range for night use, and double-check fit for your specific monitor (especially curved or thick-backed models).
- BenQ ScreenBar Pro LED Monitor Light Bar
- Pros: Known for strong desk-focused lighting with screen glare control; typically offers robust dimming/CCT options.
- Cons: Premium pricing compared with generic bars; fit can be finicky on some monitor shapes.
FAQ
Does a monitor light bar reduce eye strain?
It can — mainly when your discomfort is driven by screen glare or extreme contrast (bright monitor in a dark room). A well-designed light bar raises desk/task illumination without reflecting on the display, which can feel more comfortable for long sessions. For broader digital eye strain habits (breaks, blinking, viewing distance), see the American Optometric Association overview of Computer Vision Syndrome.
What matters more for comfort: brightness or optics?
Optics usually matter more. A bar that’s bright but spills onto the screen can create reflections and discomfort glare. Look for an asymmetrical “cutoff” beam pattern designed to keep light off the display while lighting the desk.
Is warmer light always better at night?
Not always. Many people prefer warmer light at night because it feels gentler, but the best setting is the one that keeps you comfortable and lets you see your work clearly. If warm light makes text look fuzzy or paper notes harder to read, go more neutral and reduce brightness instead.
Will a light bar work on a curved monitor?
Sometimes, but it depends on the mount and how the light distributes across the curve. If the bar isn’t designed for curved displays, it may sit insecurely or produce uneven desk lighting. Confirm curved-monitor support (or an included adapter) before buying.
How do I know if my light bar is causing screen glare?
Open a black screen in a dim room and turn the bar on. If you see bright streaks, reflections, or a noticeable bright band on the display, the light is hitting the screen. Try re-aiming the bar; if glare persists at normal working brightness, you likely need better cutoff optics.
If my eyes still hurt, should I keep changing lighting?
If you have ongoing eye pain, headaches, or blurry vision, don’t treat lighting as a cure-all. Lighting and ergonomics can help, but persistent symptoms are a good reason to consult an eye care professional. You can also consider an ergonomics review with a certified ergonomist or occupational therapist to dial in screen height, viewing distance, and glare sources.
Bottom Line
For “BenQ vs Yeelight for eye strain,” the deciding factor is glare control: a true asymmetrical cutoff that lights your desk without washing your screen. If you want the safer, more purpose-built choice for comfort, BenQ’s ScreenBar Pro is the pick; if you’re going Yeelight for value, make sure the exact model has real cutoff optics and fits your monitor so you don’t accidentally introduce reflections.
Affiliate disclosure: This page includes affiliate links. Purchases through these links support our work at no added cost.